Restoring A Classic Car??
You ever look at something and think, Yeah, I can totally handle that, only to realize halfway through that maybe you were being wildly optimistic? That was me when I decided to restore a 1967 Ford Mustang. Now, I’m not a pro mechanic or some car-whisperer. I’m just a middle-aged guy with a lot of enthusiasm, a toolbox I got on sale, and YouTube tutorials at my fingertips. Spoiler: It was a ride (pun intended).
Here’s how it all went down—and how you can do it too, without losing your sanity or your savings.
Step 1: The “Brilliant” Decision
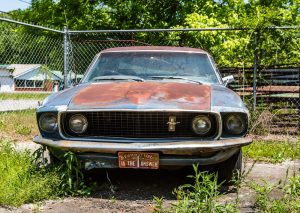
It started on a random Tuesday. I was scrolling through an online marketplace, just minding my business, when I saw her: rusty, beat-up, barely recognizable as a car, but still somehow majestic. The ad read, “Project car. Needs work.” Understatement of the year. But hey, she was cheap, and I’d been dreaming of a classic car restoration since I was old enough to hold a wrench (okay, a plastic toy wrench, but still).
Before I could talk myself out of it, I messaged the seller, and by Saturday, the Mustang was in my driveway. My wife gave me the look—you know, the one that says, This better not turn into a giant money pit. I gave her my best reassuring smile. Inside, though? Total panic.
Step 2: Assessing the Damage
The first thing I did was a full walkaround, clipboard in hand like I was auditioning for a role on a car restoration reality show. It didn’t take long to realize this wasn’t going to be a weekend project.
The paint? More rust than color.
The interior? Torn seats, cracked dashboard, and a smell I can only describe as “vintage decay.”
The engine? Let’s just say it was more of a suggestion of an engine.
But hey, it’s not a classic car if it doesn’t need some TLC, right?
Step 3: The Research Rabbit Hole
Here’s where I made my first rookie mistake: thinking I’d just “wing it.” Classic car restoration is NOT one of those “learn as you go” kind of hobbies. After a few failed attempts to remove parts without breaking them (pro tip: label everything), I realized I needed a game plan.
So, I dived into research like my life depended on it. Forums, videos, manuals—I consumed it all. Did you know there are entire YouTube channels dedicated to taking apart Mustangs? Neither did I. Bless those guys.
Step 4: Tools, Tools, and More Tools
Now, let me tell you something: no matter how many tools you think you have, it’s not enough. I started out with the basics—wrenches, screwdrivers, socket sets. Then came the specialized stuff: a torque wrench, a floor jack, and a grinder (because rust doesn’t go down without a fight).
Every trip to the hardware store was like stepping into a black hole for my wallet. But hey, tools are an investment, right? That’s what I kept telling myself.
Step 5: One Part at a Time
I learned pretty quickly that trying to tackle everything at once is a recipe for frustration. So, I broke it down into smaller projects:
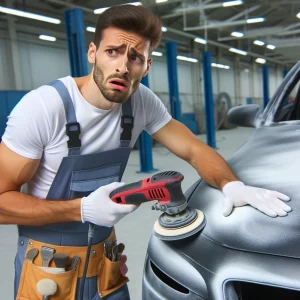
The Bodywork: Rust removal became my new workout routine. (If you’ve never sanded down a fender for three hours straight, you haven’t lived.)
The Interior: I salvaged what I could and replaced the rest. Installing new upholstery was like trying to put a fitted sheet on a mattress that hates you.
The Engine: This was the most intimidating part, but I took it slow. A buddy of mine helped rebuild it, and by “help,” I mean he did most of the work while I handed him tools and asked dumb questions.
Step 6: The Highs and Lows
 There were moments of triumph—like the first time I got the engine to turn over—and moments of despair, like when I accidentally spilled paint thinner on the freshly primed hood. (Pro tip: don’t leave open containers of chemicals lying around.)
Every setback was a lesson, though. I learned to be patient, to ask for help when I needed it, and to celebrate the small wins—like finally figuring out how to reinstall the dashboard without cursing.
Step 7: The Big Finish
After months of late nights, weekend marathons, and a few too many trips to the parts store, the day finally came: the Mustang was back together, shining like a dream. Sure, she’s not showroom perfect, but she’s mine, and every scratch and imperfection has a story behind it.
When I took her for that first spin, it felt like magic. There’s nothing quite like cruising down the road in a car you brought back to life with your own two hands (and a lot of borrowed tools).
Lessons Learned
If you’re thinking about restoring a classic car, here’s my advice:
Start small. Don’t go for a total rust bucket unless you’re ready for a challenge.
Budget wisely. Parts and tools add up fast.
Be patient. This isn’t a sprint; it’s a marathon.
Ask for help. Whether it’s a friend, a forum, or a pro, don’t be afraid to lean on others.
Most importantly, enjoy the process. It’s not just about the finished car—it’s about the journey, the learning, and the stories you’ll have to tell.
So, what are you waiting for? Go find your dream car, grab a wrench, and dive in. Just maybe don’t tell your wife it’ll be “cheap and easy.” Trust me on that one.
